Showing posts with label Ken Stone. Show all posts

Friday, 12 May 2017

A-147 LFO Wave Skew Mod

A simple modification to gain voltage controllable wave shapes from Doepfer’s A-147 VCLFO. Learn how to turn this old stalwart into a morphing modulator with just a couple of resistors.


The A-147 is a triangle/square-wave oscillator built around the pairing of an integrator and comparator. They work in a loop with the one feeding the other, back and forth. You can see them in action here.

The result of integrating a square wave is a triangle. But if we independently change the rate at which the integrator charges and discharges, we can skew the waveform from a rising to falling sawtooth via a triangle. Because the integrator and comparator are related, the square wave becomes a variable width pulse.


The easiest way to achieve this is to hijack the square-wave on its way to the integrator, split its path with two diodes and then set the balance with a potentiometer. You can see this manual arrangement in Ray Wilson’s Variable Skew LFO or Ken Stone’s Utility LFO.

To get proper voltage control over this ‘re-balancing’ might take a considerable amount of extra active circuitry, more than I felt the effect is worth, especially given the digital options available today. Here’s my simple kludge:


The idea is to massively reduce the size of the square wave going into the integrator so that the injection of an external voltage is enough to shift the bias of the square and hence alter the shape coming out of the integrator.

Resistor R14 (15k), which is to the left of the quad opamp (TL084) forms a voltage divider with the 1k resistor which also marked in yellow in the picture above. The output of this divider goes to the CA3080 OTA for integration. I found that swapping the 15k for a 1M resistor was enough to allow the bias to be shifted with a +/-5V CV. For the CV input I ended up using two resistors in series to give me 670k rather than the 1M in the picture.

Reducing the amplitude of the square wave to the integrator also reduces the overall frequency of the LFO, so I also swapped the 0.1uF capacitor C2 for a smaller 15nF to bump up the speed.

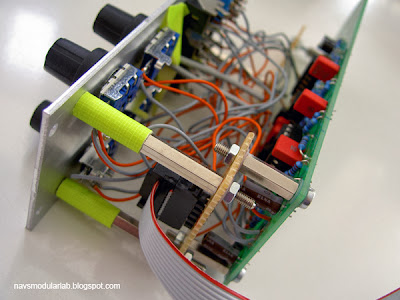
Below is how it looks and here are some construction pictures.


I like simple mods - minimum change for maximum effect. Skewing the wave shape with this method also changes the frequency of the LFO, which you might not want. There is a way to compensate for this, but again, I decided it wasn’t worth the extra circuitry as I like the effect of the LFO slowing down as it changes direction, almost like a thru-zero oscillator. But you could try the following schemes. One is relatively simple, the other might need an expander module to provide space for the extra PCB. Neither is perfect.

The idea here is to inject a fraction of the skew CV to the A-147’s FCV input. For example, given a skew CV of 5V I found I needed about 5-600mV FCV to correct the frequency. You can use the attenuator on the module for this or send your skew CV via a ca. 560k resistor to the output pin of the 50k FCV potentiometer (ahead of the FCV buffer). The ‘gotcha’ with this method is that it only works for positive offsets as we always need to speed up the LFO when skewing.

What is needed is an active full-wave rectifier to ensure that the compensation voltage is always positive. This is a simple enough circuit to add but for the lack of space behind the panel. If you want to try this, have a look at Jim Patchell’s Ideal Diode Tutorial hosted at René Schmitz’ Schmitzbits site.

The usual DIY disclaimers apply - you do this at your own risk. Have fun but take care of your module and yourself!

Thank you Tim Stinchcombe for identifying the relevant parts and for your thoughts and suggestions.

Wednesday, 5 March 2014

CGS77 Serge 1973 Filter Demo

Sounds of the CGS77, Ken Stone's adaptation of the original Serge filter, are scarce. I hope these recordings help anyone considering this DIY build.


I'm really not a filter man, but the Serge VQVCF is something special. This circuit is its 1973 ancestor. The state variable found in today's systems has been refined with gain compensation and a trigger input. But Ken Stone tells me that the CGS77 is essentially the same core and my ears aren't about to argue.


If you want to hear more, please buy the EP for the unedited recordings and pictures of my build.


Building CGS modules for Eurorack presents the DIY-er with the problem of how to accommodate the PCB. Others have opted for 'best-of' panels, combining several PCBs behind one large interface. My solution was initially based on a false assumption - that I could cut below the CGS77's 'dotted line' to remove the unneeded buffers and mount it vertically.


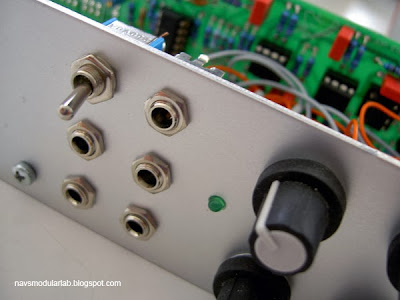
I should have done this before populating the board, so I settled on another tactic. Using stand-offs and making sure the module in the row below is less than 4 cm deep, my '73 filter is a dashing 10HP. Here are the guts and here its installed.


On the mechanics, I used Charlie The Bad Producer's method of attaching the power via a perfboard add-on. I considered normalling the band-pass to the input for self-oscillation, but found in testing that the '73 doesn't make a particularly stable oscillator. The HP & BP are nice, but not as good as the Plan B Model 12, so I might leave them out on a future build. Other casualties might be the DC mode and LED. This filter responds well to modulation, so an additional CV input would be more useful: this can be added in at the points marked S & R on the schematic.

Thank you Serge & Ken for this wonderful filter, negativspace for BOM help and my brother for the boards!

Wednesday, 25 July 2012

Anthony Bisset live at Basic Electricity

Anthony Bisset will join Franz Schuier & Lu Katavist at Basic Electricity #5 on Friday, August 31st!


See the Basic Electricity blog for more on the gig and click the 'Machine' link at Anthony's site to see his reformatted modular 'with DNA from Serge, Buchla, Ken Stone & Bisset' and other live instruments.

BE#5, 31.08.12, 21:00
Lichtblick Kino. Kastanienallee 77,
10435 Berlin (Prenzlauer Berg)

Friday, 6 July 2012

Turing with Bitsy

A quick jam featuring two DIY shift-register-based random sequencers, Tom Whitwell's Turing Machine and my own Bitsy.


Playing with sequencers that you can't program, only influence, is great fun. As you can hear, the two make a great team!


Just add a quantizer, and you're away. (Turing left, Bitsy right).


Tom managed to pack a lot into his sandwich design. It's tight in places, but it does all fit. My own DIY projects have been primitive by comparison, using perf-board and flying connections for the pots and jacks. The one benefit of this method is that it's more forgiving of part placement when it's time to screw the module together. I might have to revisit some of the jacks to help them sit better. I made two minor changes to Tom's design, one out of necessity, the other for aesthetic reasons: I ordered the wrong size polyboxes, so substituted ceramic caps for C10 & C11, and I went for a green LED, rather than red. I still need to paint the legends, but don't mind the look of the sticker residue for the moment.

You can find extensive information on the Music Thing Random Sequencer project here, here and here.

Thanks for a great instrument, Tom!

Sunday, 23 October 2011

Even More Hazarai!

Modifying the Electro Harmonix Stereo Memory Man w/ Hazarai delay pedal for external tap clock. A follow-up to this post.


Two years on from blogging Rechner7's project, I've finally modded my SMMH, a delay which features heavily in my recordings and live sets. I'd never found the original tap tempo function a hindrance to getting interesting echo, but was inspired to give the mod another look after seeing Mr Biggs' video of his project. I'm glad I did, as the additional inputs have yielded a few surprises.

Here's how it sounds: smmh_mod1.mp3

I kept my mod simple, adding one external clock jack, a three-position switch (on + HP filter, off, on without filter) and a softer response tap button. The internal changes consist of Ken Stone's Gate to Trigger and Doepfer's Gate to S-Trigger circuits. Here's my perf-board layout. As r7 originally warned, the most difficult part of the operation was removing the PCB from the enclosure. After a few frustrating attempts, I gave up, masked the PCB with paper and drilled my holes with the board in place.

So, was it worth it? Yes, but not for the reasons I originally assumed. While tempo-syncing is nice, I actually prefer the sound of echos which are not perfectly in time. The new momentary switch was a last minute decision and I'm glad I added it. It's less clunky than the original foot-switch and makes tapping easier. That doesn't mean the clock input is redundant - it comes into its own when fed with random gates, for example from a tail-chasing Wogglebug.

As you can hear, this is where the real fun starts: smmh_mod2.mp3

Thanks to Rechner7 and Mr Biggs for answering my questions and for their encouragement. It's a simple project that helps integrate the SMMH with the modular, so highly recommended. As ever, the usual disclaimer applies: modding you pedal will void your warranty and is carried out at your own risk!

Friday, 14 October 2011

Bitsy - Stepped CV Generator/ Recorder

A DIY Ring Counter based on Ken Stone's Gated Comparator circuit.


My inspiration for this module was Grant Richter's Wiard Noise Ring - a random CV generator with a form of memory. While I liked its ability to capture an eight note sequence, I found it hard to control and wanted some method to reliably input my own data.

I first thought an analogue shift register - a chain of sample + holds - might provide the solution. Thanks to a prod in the right direction from Matthias of Fonitronik, I discovered Scott Stites' Klee sequencer and later Rob Hordijk's Rungler and Ken Stone's digital shift register circuits.


Using a CMOS chip like the 4015 or 4021 won't allow you to sample your own CV stream, but the end result is the same. A series of zeros and ones is converted into a stepped CV via a DAC, in this case an R/2R network. Feeding the last stage of the shift register back to the input allows you to hold a sequence. Here's how it sounds:


I built Bitsy as a companion to the Wogglebug, which provides the clock and data, via its burst output. Like the Klee, it can also be programmed via a sequencer or manual gates. To simplify the design, I left out the input comparators of Ken Stone's circuit. A switch is used to manually hold a sequence. The last stage is also available, allowing VC over new/ old data selection via a sequential switch like the Doepfer A-151. An LED reflects the voltage level.


I used the DIY Layout Creator to plan my perfboard and a 6HP Makenoise blank as faceplate. This was the first time I'd made a parallel board, which meant using wire connections for the jacks etc. However, the benefit of this was I didn't have to be totally accurate when drilling holes.

Thanks to Matthias for the hint and to the designers of the original circuits which inspired this project!

Monday, 5 September 2011

From Bananas to Blippoos

Some pictures from a day in Richard Scott's studio.


Richard's studio is an Aladdin's Cave of Banana-jack synths. The Buchla VCO was on its way to its new owner, so I was lucky to get a chance to hear it. While it looks fantastic, I wasn't taken by its sound. Financially speaking, this is probably a good thing. The Serge & CGS system was much more to my taste. I was surprised at how familiar I was with its patching vocabulary, due in part to certain Serge-inspired Euro modules, and was able to dive straight in. The Bugbrand is a cracking, compact system with a gutsy sound. But of all the synths in the studio, I lost my heart to the two Hordijk boxes, the wonderful Blippoo and Benjolin.

Thanks to Richard for a wonderful afternoon and the pukka pakoras!

Tuesday, 9 August 2011

Patch Tips #17 - Sport Detector

Using the Toppobrillo Sport Modulator as a slope detector.


One of the most interesting aspects of Mono-Poly's performance at the recent Basic Electricity night in Berlin was his use of slope detectors to generate rhythms. Feeding a pair of Ken Stone/ Elby Designs CGS762s with the outputs of his Wiard/ Malekko Noise Rings yielded unpredictable, yet in sync, patterns.


I'd previously tried the patch example in the Sport Modulator manual without much success. Inspired by the results Mono-Poly got from this configuration, I gave it another shot:

Sport Detector by navs

I used an LFO, reset by a clock divider to feed a Wogglebug which sampled the incoming CV at a rate set by a master clock. This CV was sent to the top section of the SM and an inverted version to the bottom. Lag for both sections was @ 2 o'clock. This setting is important as it determines the SM's reaction time and hence the accuracy or otherwise of the resulting gates. When the CV is rising, a gate is output from the top END (left channel), when it's falling from the bottom END (right).

In the examples, I toyed with the clock divider's reset, the LFO speed and also injected some chaos via the Wogglebug. As you can hear, this is a great way to generate pulse patterns on the fly.

Wednesday, 14 January 2009

CGS52 Simple Wave Folder


Here's a few clips of my first DIY module, Ken Stone's Lockhart/ Simple Wave Folder:


Basic run-through, unaffected signal first.


Various complex/ FM'd and filtered waveforms put through the mill. First minute and a half Doepfer A-105 filter, then Plan B Model 12. Ken Stone says the module must be fed a sine or triangle to work. I have to disagree ;)


I know I swore I'd never go near a soldering iron again after building the Trobetronic40 but, encouraged by Paul at Schneidersbuero and 'Roter Agent' at the sequencer.de forum, I gave it another go. Cheers lads! Added an extra attenuator and cap and an LED cos we all love blinkies, right?